In Tokeet, you can create multiple templates for messages that you routinely send to guests or your internal team.
Message Templates are utilized by Tokeet Triggers/Automations which can be event-based or time-based. Once you define a template and associate it with a trigger, you can send an email, send an SMS message, send a contract, or post to a URL.
The process for creating Message Templates is easy with Tokeet. Please also feel free to use and build on our examples in the Message Template Examples section further below.
Setting up Templates
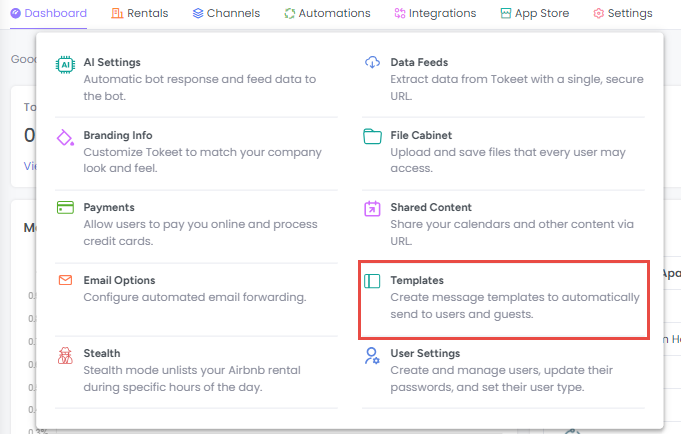
Navigate to Settings > Templates
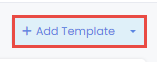
Click the "+ Add Template" button.
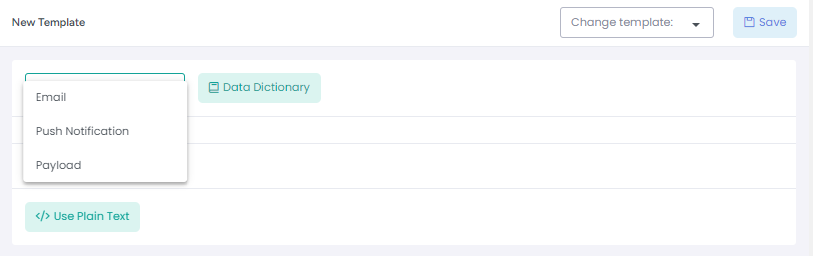
Select a template type. You can select from any of the three options below.
Email: Creates an email template
Push Notification: Creates a short message designed to be pushed as a notification to users with the Tokeet app installed.
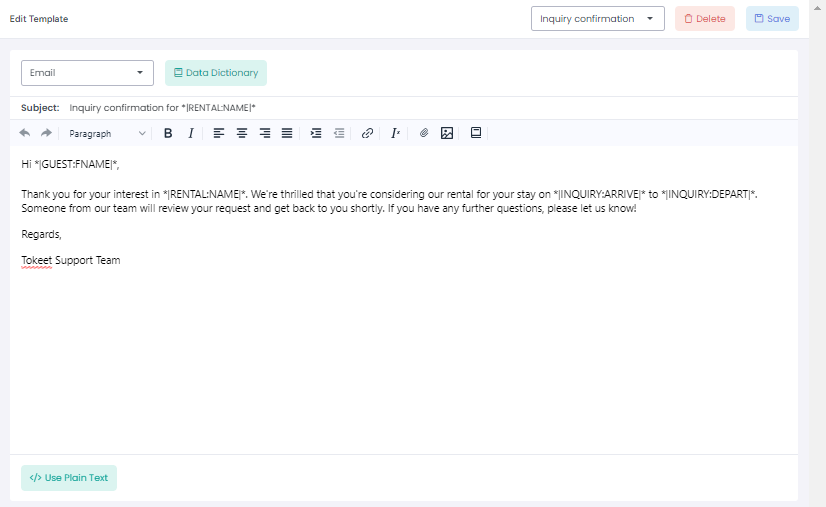
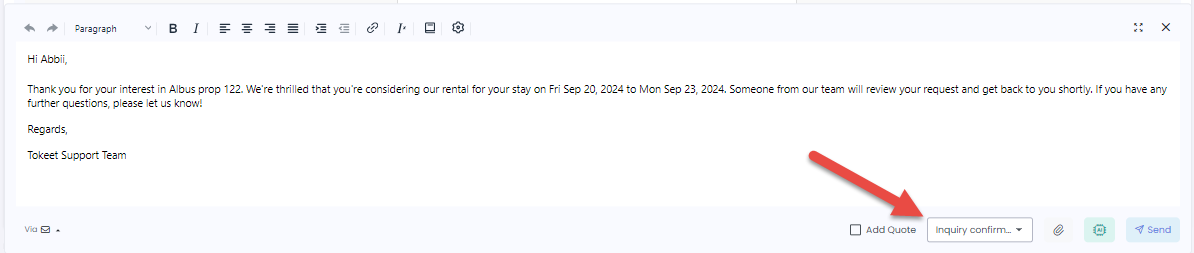
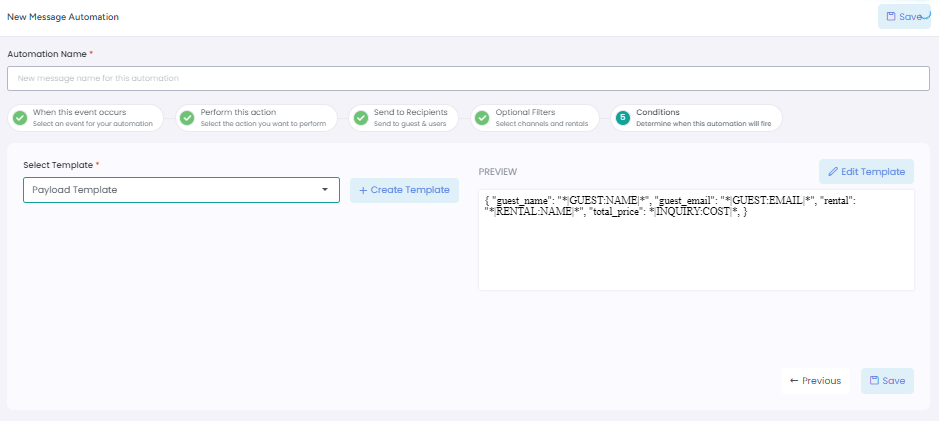
Payload: Create a template designed to push data to a 3rd party application. For more info please see the section below on HTTP Webhook TriggersYou can insert placeholders our system will automatically replace when sending the message by opening the Data Dictionary. See an example of a template using data dictionary codes below.

Once you have finalized your template, click "Save" to give it a name and store it in Tokeet.
That’s it! Your message template is now available to you.

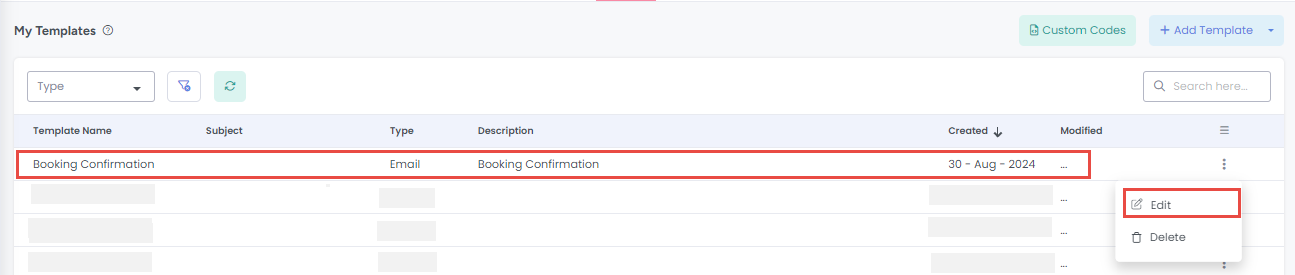
To edit the saved template simply click on it or use the edit button (3 dots) to select Edit from the menu.
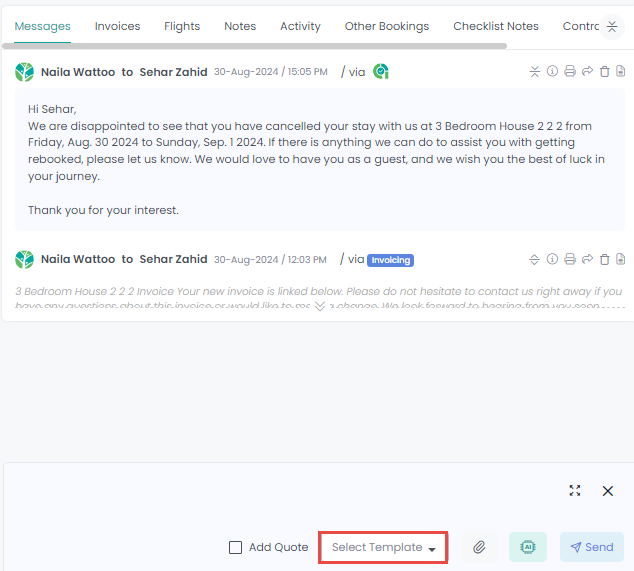
Once your template is created, it can be used in the Tokeet Automations module or sent manually by selecting it from the template drop-down on any message sent to your guests.
Message Template Examples
We have 3 types of templates for message:
1- Email Template:
In Tokeet, you can easily create Message Templates for messages that you routinely send to guests or to your internal team.
Message templates can be sent via Tokeet Triggers, or on an ad hoc basis by clicking into a particular booking in the Inquiries section. You can also insert placeholders from the Tokeet Data Dictionary, which our system replaces automatically in real time.
Here are a few examples of great message templates for you to use and build on. With all of these, please make sure you have the corresponding fields populated in your Rental Settings. For example, Checkin and Checkout times originate from your Rental Settings > Rental Instructions section.
Internal: Booking Received Email
Subject: New Booking Received!
Rental Name: *|RENTAL:NAME|* Rental Address: *|RENTAL:ADDRESS|*, *|RENTAL:CITY|*, *|RENTAL:COUNTRY|*Guest Name: *|GUEST:NAME|* Guest Email: *|GUEST:EMAIL|*Guest Phone Number: *|GUEST:PHONE|* Booking Dates: *|INQUIRY:ARRIVE|* - *|INQUIRY:DEPART|*Number of Nights: *|INQUIRY:NIGHTS|*Booking Cost: *|INQUIRY:COST|*Number of Adults: *|INQUIRY:ADULTS|*Number of Children: *|INQUIRY:CHILDREN|*Checkin Time: *|INQUIRY:CHECK_IN|*Checkout Time: *|INQUIRY:CHECK_OUT|*
Guest: Booking Received Email
Subject: Thank you for booking with us!
Dear *|GUEST:NAME|*,
Thank you for your reservation at *|RENTAL:NAME|*. We are looking forward to welcoming you in *|RENTAL:CITY|*! Your reservation is confirmed with the following info:Name: *|GUEST:NAME|* Email: *|GUEST:EMAIL|*Phone Number: *|GUEST:PHONE|* Dates: *|INQUIRY:ARRIVE|* - *|INQUIRY:DEPART|*Checkin Time: *|INQUIRY:CHECK_IN|*Checkout Time: *|INQUIRY:CHECK_OUT|*Property address: *|RENTAL:ADDRESS|*, *|RENTAL:CITY|*, *|RENTAL:COUNTRY|*Please let me know if you have any questions. I will contact you 24 hours prior to checkin to coordinate key pickup and to provide more info.Thanks again and we're looking forward to your visit!
Guest: Pre-Checkin Email
Subject: Enjoy your stay with us!
Dear *|GUEST:NAME|* ,Your reservation at *|RENTAL:NAME|* is upcoming in 24 hours! We look forward to welcoming you in *|RENTAL:CITY|*!The property is located at:*|RENTAL:ADDRESS|**|RENTAL:CITY|**|RENTAL:COUNTRY|*Your property will be ready by *|INQUIRY:CHECK_IN|*. Please don’t hesitate to contact us with any questions, or to help coordinate transport from the airport or train. Your complete satisfaction is our goal.See you soon!
Guest: Pre-Checkout Email
Subject: Your upcoming checkout
Dear *|GUEST:NAME|* ,We hope you enjoyed your stay at *|RENTAL:NAME|* and explored everything *|RENTAL:CITY|* has to offer. We’re sad to see you go.The regularly scheduled checkout time is at *|INQUIRY:CHECK_OUT|*, so that we can make the property ready for our next guest.Please don’t hesitate to contact us with any questions, or to help coordinate transport to the airport or train.Thank you again and bon voyage!
Guest: Post-Checkout Email (Request for Review)
Subject: Thank you for being our guest!
Dear *|GUEST:NAME|* ,It was a pleasure hosting you at *|RENTAL:NAME|*. We trust that you are safely back at home, with thoughts of *|RENTAL:CITY|* still on your mind. We would like to thank you for choosing us to spend your vacation.If there is anything which we could have done to make your trip more enjoyable, please let us know. Your complete satisfaction is our goal.We would also like to kindly ask you to provide a review of *|RENTAL:NAME|* on Tripadvisor.
How to Use Email Templates:
You will be able to use email template for sending messages to guest by simply follow the below steps:
Navigate to Settings > Templates

Click the "+ Add Template" button.
Select the template type: Email.
Create the template and click Save.
Now open the inquiry you want to apply the template to.
Move to the messages tab, click on the envelope icon appearing at the bottom right to send a new message.
Select the template from the dropdown, the template will appear in the email body.
You can now send this email to the guest.
2- Push Notifications Template:
Tokeet allows you to automate notifications based on different actions so that you never miss a deadline or fail to send necessary information to your guests or team members. Here is how to set push notification triggers within Tokeet.
Navigate to Settings > Templates

Click the "+ Add Template" button.
Select the template type: Push Notification.
Create the template and click Save.
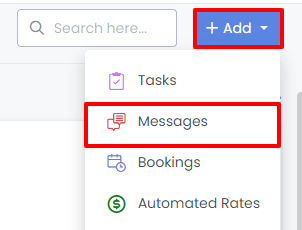
Now move to the Automations module.
Click on the + Add dropdown and select the Messages option to create a push notification automation.
Select the Event type and set a configuration for all required fields.
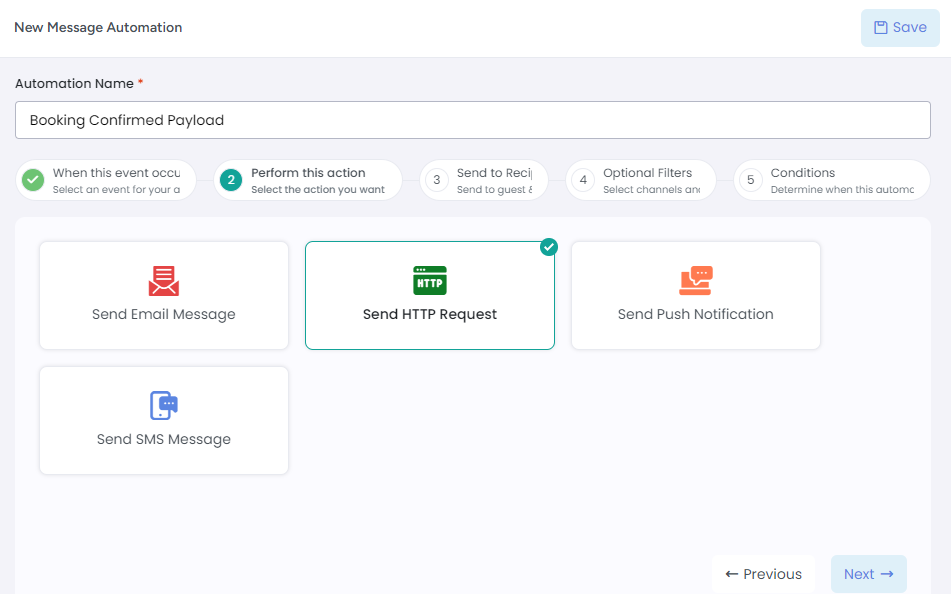
Perform this action: Choose Send Push Notification.

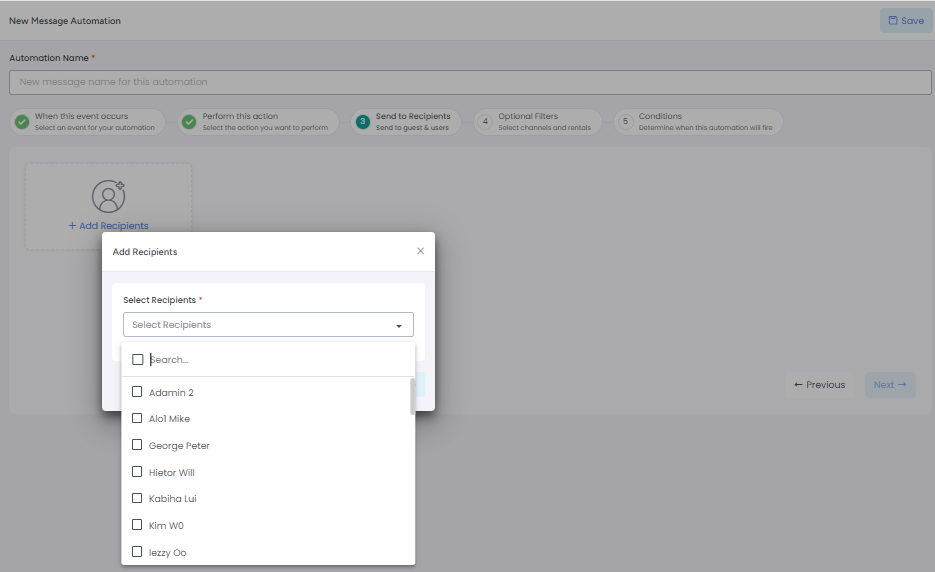
Send to the Recipients: Select at least one internal Tokeet user to be notified.
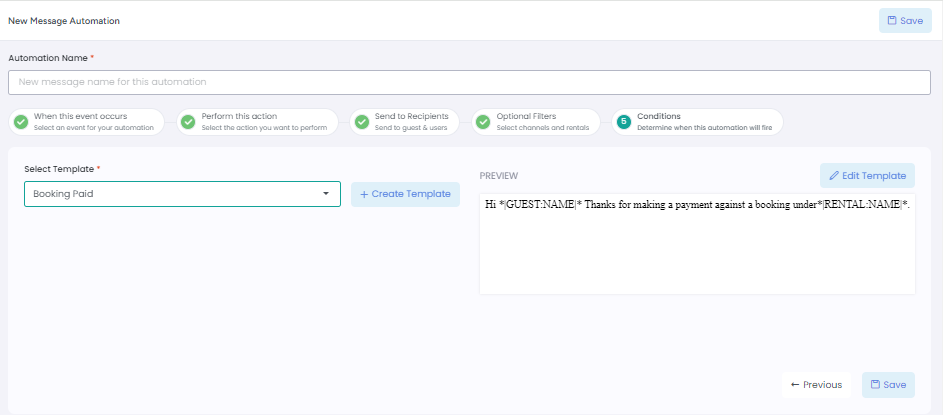
Conditions: Choose which Message Template to send for your push notification automation.
Once you’ve created a Push Notification trigger, the selected recipients will receive an automated Push Notification in when the event you’ve specified occurs.
3- Payload Template:
HTTP Webhook Triggers
Tokeet Triggers are a powerful and flexible way to integrate Tokeet with other third-party applications. Triggers are executed immediately when the associated event occurs in Tokeet. So, if you set up a trigger that is linked to the Guest Created event then the trigger will be executed the second a guest is created in Tokeet.
You can set your trigger to perform an HTTP post to a URL which will send the data in your assigned template to the configured URL.
What does all this mean? Simply put, Tokeet can be configured to send Tokeet data to any third party application immediately when that data is created, updated, or deleted. This simple feature opens up a world of possibilities for those users who need to extend the features of Tokeet by integrating other applications. Combined with the Tokeet API, users will have real time connections between Tokeet and any other application which can communicate via HTTP.
The template used in a HTTP Trigger is posted to the URL specified in the trigger. This template may be of any format the user chooses. Users may set up XML, JSON, or Key/Value data in the template and then use the Tokeet Data Dictionary to instruct Tokeet to automatically insert application data into the template prior to trigger execution. In order to use JSON or XML the user has to set the template editor to rich text format before editing. You do so by clicking the HTML/Rich Text button at the far right of the template editor toolbar.
Be sure that your URL is able to accept HTTP Post requests. Tokeet currently does not support any other HTTP method. Also, most other methods do not allow for data transfer. Also, Tokeet does not retry if the service designated by the URL is unavailable or another error condition is returned. Finally, all HTTP failures are done quietly. This means that Tokeet will not notify you of a failure or show an error status. These two last points may be changed in the future as user requirements evolve.
To add a Payload template:
Navigate to Settings > Templates
Click the "+ Add Template" button.
Select the template type: Payload.
Create the template and click Save.
Now move to the Automations module.
Click on the + Add dropdown and select the Messages option to create a payload automation.
Select the Event type and set a configuration for all required fields.
Perform this action: Choose Send HTTP Request.
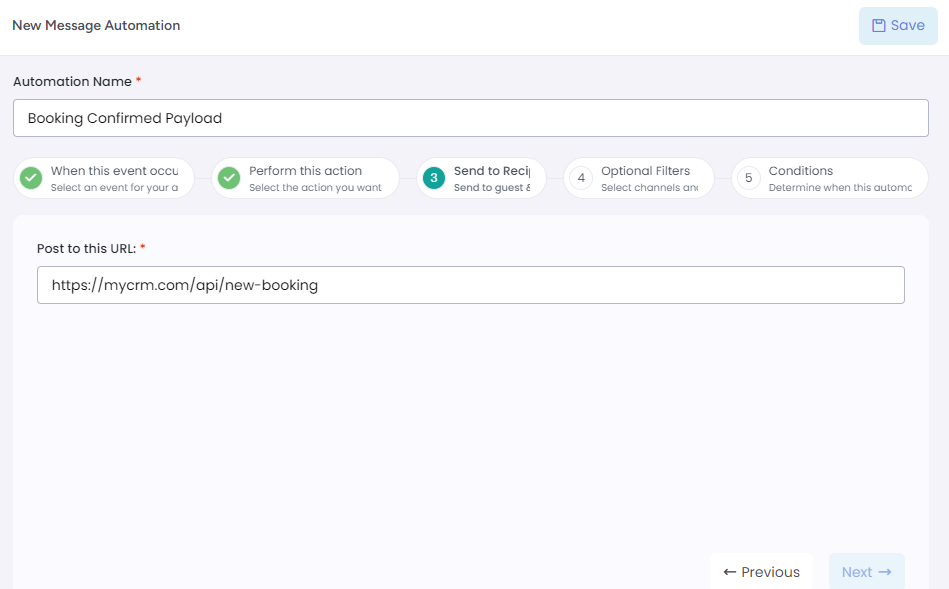
Under the Send to Recipient step, page your Post url/Endpoint into the provided space.
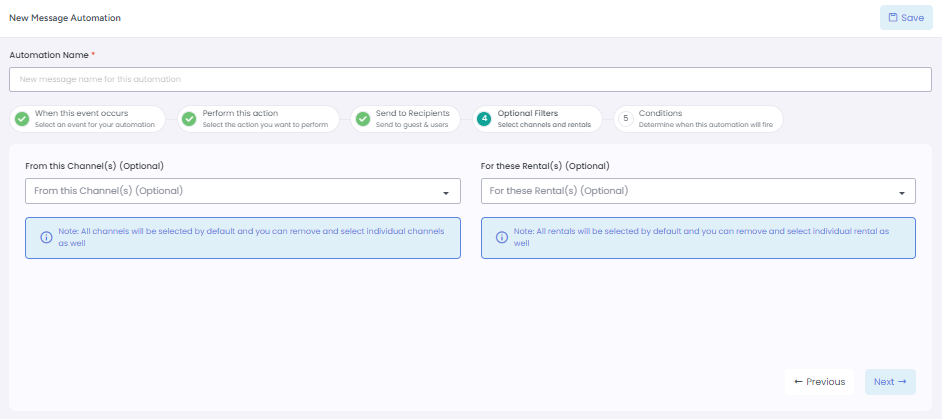
Optional Filters: In this step you can choose to send this automation for specific rentals or channels or leave them blank to send to all.
Conditions: Choose the Message Template to send for your payload automation.
If you have any further questions regarding setting up an HTTP Trigger please let us know by contacting support.
Custom Codes
Making templates that work universally for all of your rental and channel combinations will be key to getting the most out of the Tokeet Advance automations module. Since the limitation of creating one trigger per event type was introduced, making a template serve many purposes is more important than ever.
To help you create templates that serve every situation we introduced Custom Codes to Tokeet.
Custom Codes allow you to create your own Data Dictionary items so that you can have 1 trigger serve more needs.
Custom Codes are found in your Templates module. Click on Settings, Templates then click on the Custom Codes button on the top right.
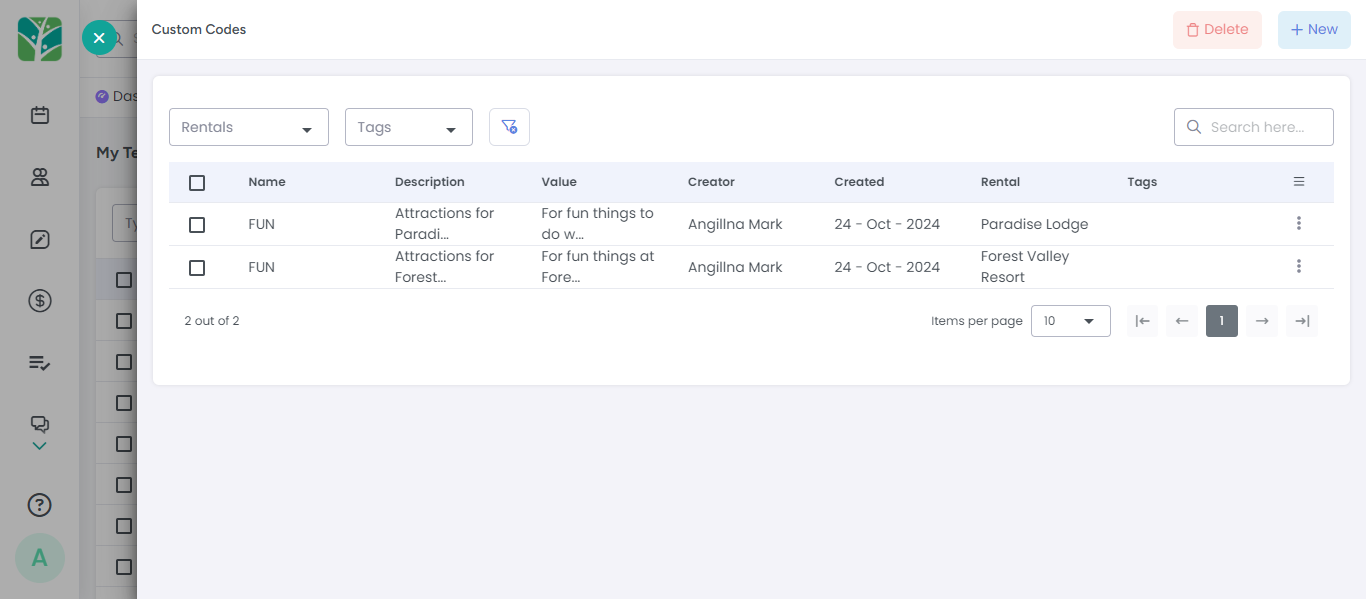
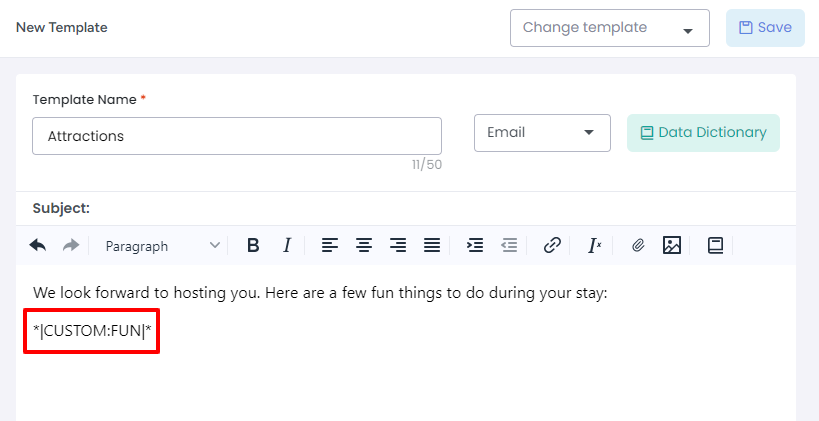
In the example below we have created 2 codes which are both called FUN. They each contain separate sets of information based on the location of the rental. Local attractions for the Paradise Lodge rental will show up when the booking that triggers the automation is for that rental, while local attractions for Forest Valley Resort will appear when the booking is for that rental.

Now, creating a template with the Data Dictionary "FUN" will mean that the correct list of local attractions shows up depending on the rental associated with the booking.