Creating a new website with AdvanceCM Website Builder is easy!
The AdvanceCM Websites feature allows you to create and manage professional websites for your rental properties. This tool enables you to showcase your listings, accept direct bookings, and provide essential information to guests, all while maintaining control over your brand identity. The Websites feature helps you build a strong online presence and attract more guests.
Create a New Website
Click on the Integrations option on the top navigation bar then on the Websites submenu.
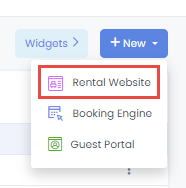
Click on +New and select Rental Website.
Enter a Website Title.
Specify a Subdomain for your website URL.
Select one of the free domains provided in the Domain drop-down selector.
Select one or more Rental(s) to include on your website.
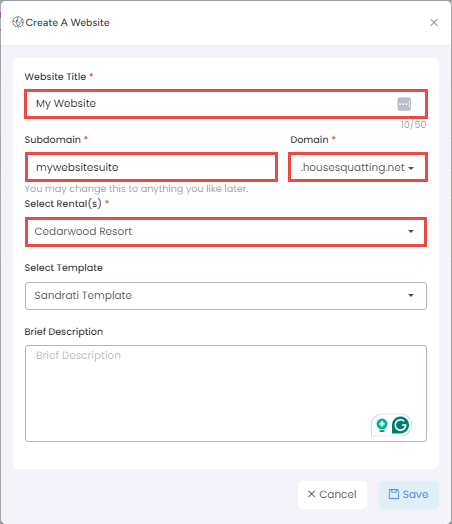 Please note that selecting multiple rentals will automatically create a multi-rental website which allows the guest to search availability and be re-directed to a results page that provides only properties available within the dates searched.
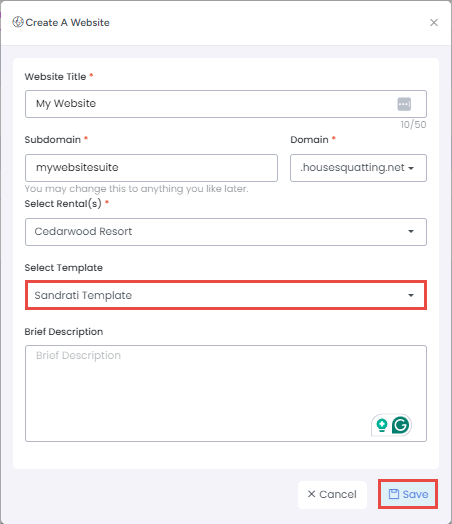
Choose a website template from the "Select Template" drop-down menu. This can be changed after you create the website.
Enter a Brief Description for your website or leave it blank and click Save.
Click on your newly created website or choose Edit from the edit menu (3 dots) to complete a few final steps.

This will open the Website Details overlay. Select a Rate Category to display on your website. This will set a price for users who book through your AdvanceCM website and may differ from what you charge for other marketing channels.
Toggle Enable Online Bookings if you would like to allow guests to use the AdvanceCM booking engine. Credit card information from your guests will be saved to your connected Stripe account, and you can decide when to charge them via an electronic invoice.
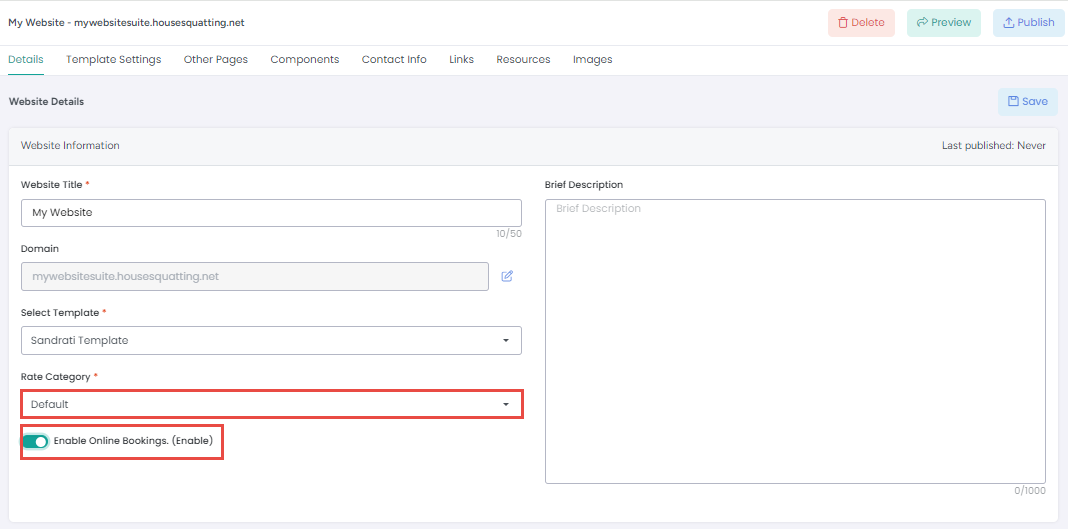
The website details overlay contains many options for customizing your website further. Each section is described in more detail below.

Template Settings: Customize fonts and colors, your website Tagline, as well as a description that will be placed in the website's footer
Other Pages: You may add pages to your website simply by creating a new page here. Your additional pages will be linked from the homepage of your website
Components: enable or disable sections of your website. You can also add Google Analytics, Mixpanel, or Facebook tracking code simply by pasting in the ID in this section
Contact Information: Add information about the contact.
Links: Enter URLs for your blog, as well as your Facebook, Twitter, and other social accounts
Resources: Include custom CSS, HTML, and JavaScript code in your site
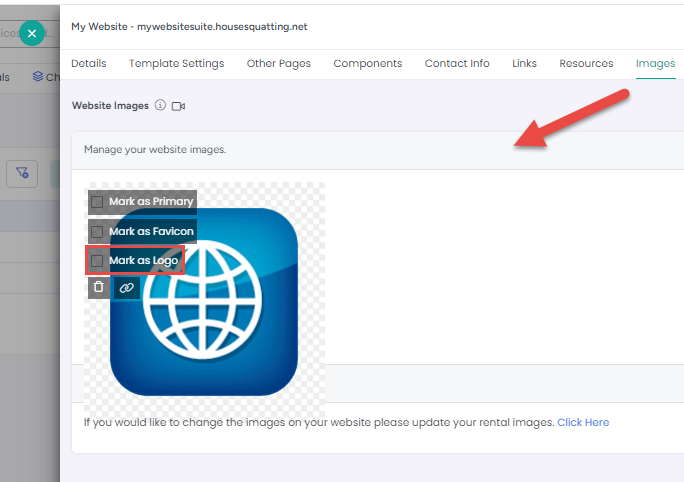
Images: Your website will use an image you've uploaded at Rental Settings. You can also add new images here.
Save and Publish to set your website live, or use the Preview button to preview your changes.
Pro Tips and Best Practices
Secure Domain
You can simply change your AdvanceCM website URL to https:// to support secure serving, example: https://gtproperties.housesquat.com/
You can make sure your website always redirects to the secure version by adding the following code in the Resources > "Raw JavaScript" section of your website:
if (window.location.protocol == "http:") {
window.location = "https://www.your-tokeet-domain.com/"
}
(where https://www.your-tokeet-domain.com/ is the secure version of your AdvanceCM website)
Multi-Property Website
If you select multiple Rentals under your website, you will create a multi-property site.
The first page will be a Search page, with the subsequent page showing all properties that match a guest's search criteria.
Here's an example of a multi-property site:
https://tss.shortlettings.net/
Use your own domain with your AdvanceCM website
You can also use your own domain with your AdvanceCM website - by making a few simple DNS changes. Read more about this process here.
Upload and set up a custom website logo
You can upload and set up a custom logo for your website.
Navigate to Websites > Images menu.
Upload an image that will serve as your site logo.
To set it as a logo, mouse over the image and select Make as logo.
