AdvanceCM's new auto invoicing allows you to automatically create, send, mark as paid and even charge invoices. This article will cover the steps required to create an invoice automation, which determines when to send an invoice and which invoice template to use when doing so. If you have not yet created an Invoice Template, please refer to the following article for a step by step on how to do so: Invoice Templates
Navigate to Invoice Automations
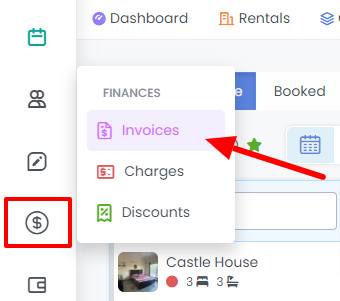
Click on Finances option in the left navigation menu then on Invoices.
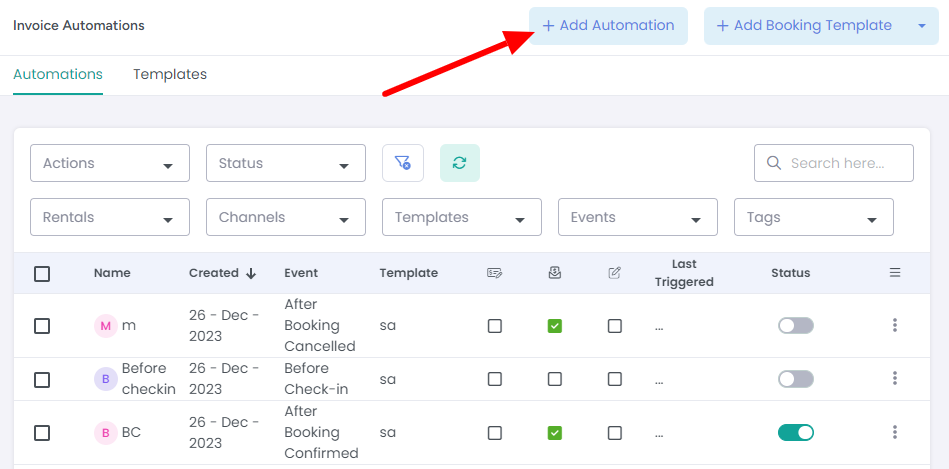
Next, click the +Add Automation button to view the Invoice Automations overlay.
Click on the +Add Automation button to create a new automation.
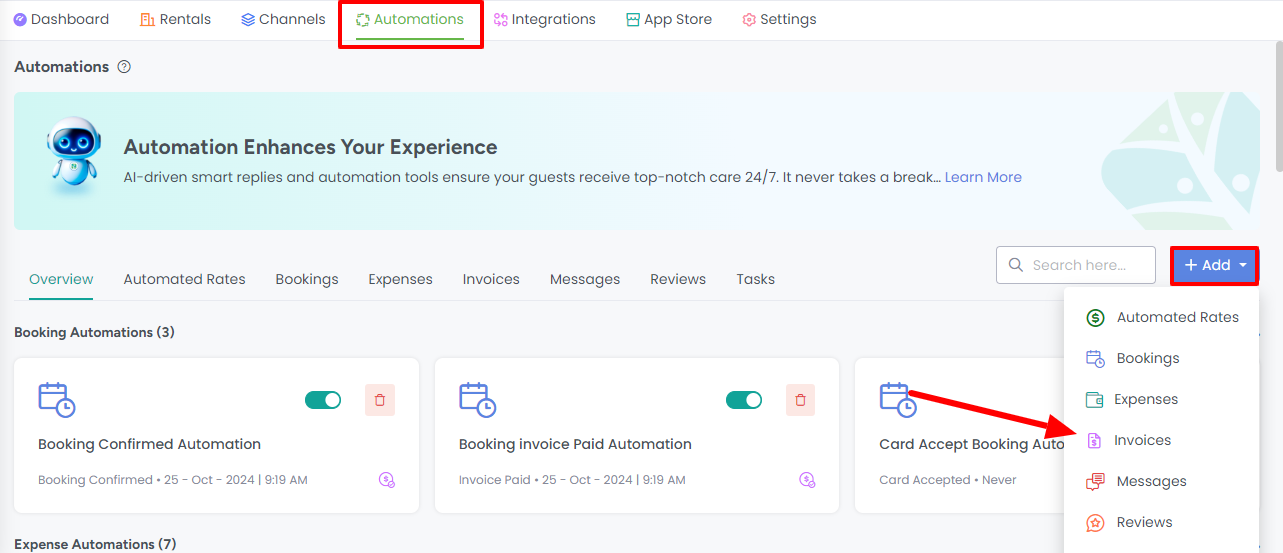
You can also access Invoice Automations from directly on the Automations page.
First, click on Automations in the top navigation bar then on the "+ Add" button and Invoices.
Creating a New Invoice Automation
Apply your automation/trigger conditions
On the first tab of the Invoice Automation overlay, you will be presented with options to control the conditions and rules for when to send an invoice to a guest automatically.
If these options look familiar to you, this is because the invoice automations feature operates very much like our add-on product Automata.
Start by entering a name for the Automation.
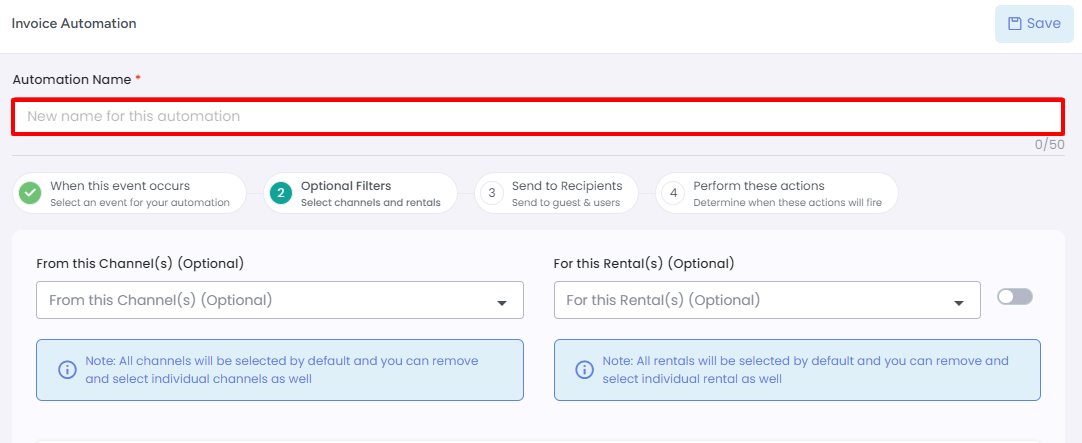
Under the "When this event occurs" step, choose when the automation should be triggered.
In the screenshot below, you can choose different events as mentioned below:
Inquiry Created: This event means send invoice under selected invoice rules when inquiry is created.
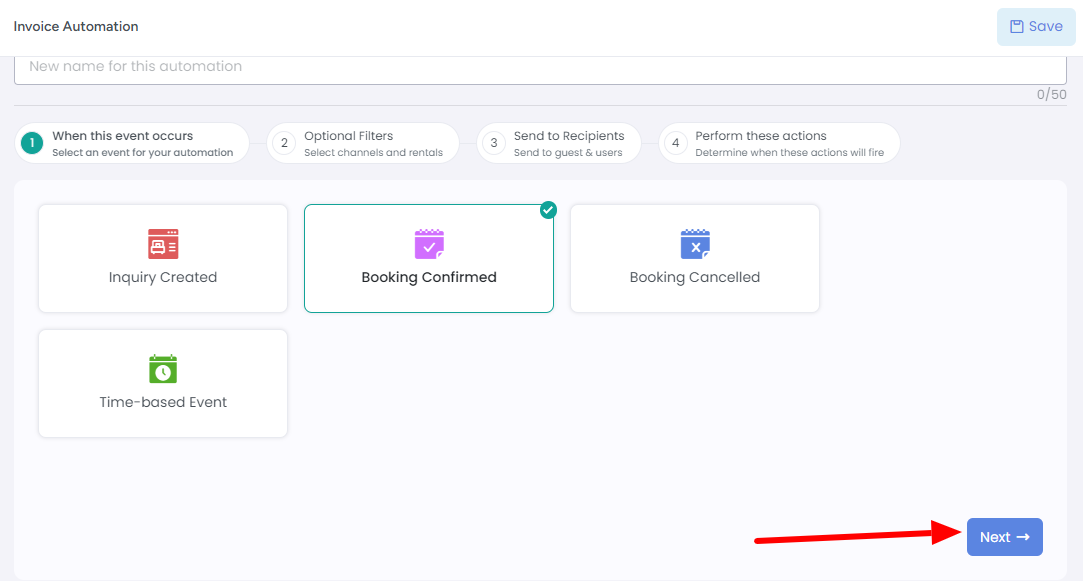
Booking Confirmed: This event means send invoice under selected invoice rules when booking status is marked as paid.
Booking Cancelled: This event means send invoice under selected invoice rules when booking status is marked as cancelled.
Time Based Events: Refer to this help article to explore about Time Based Events
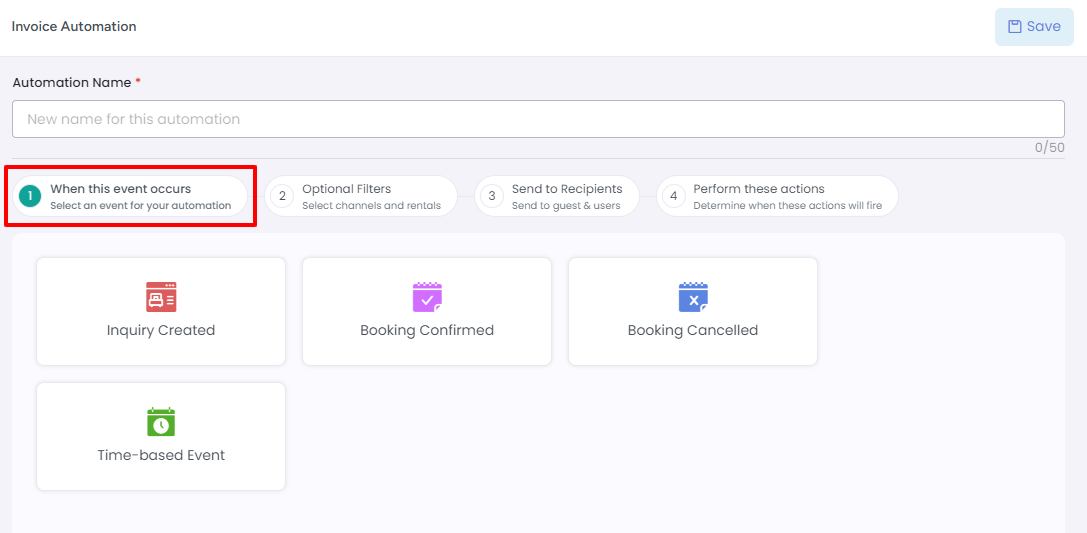
Once you've selected when this trigger should fire, click on the Next button.
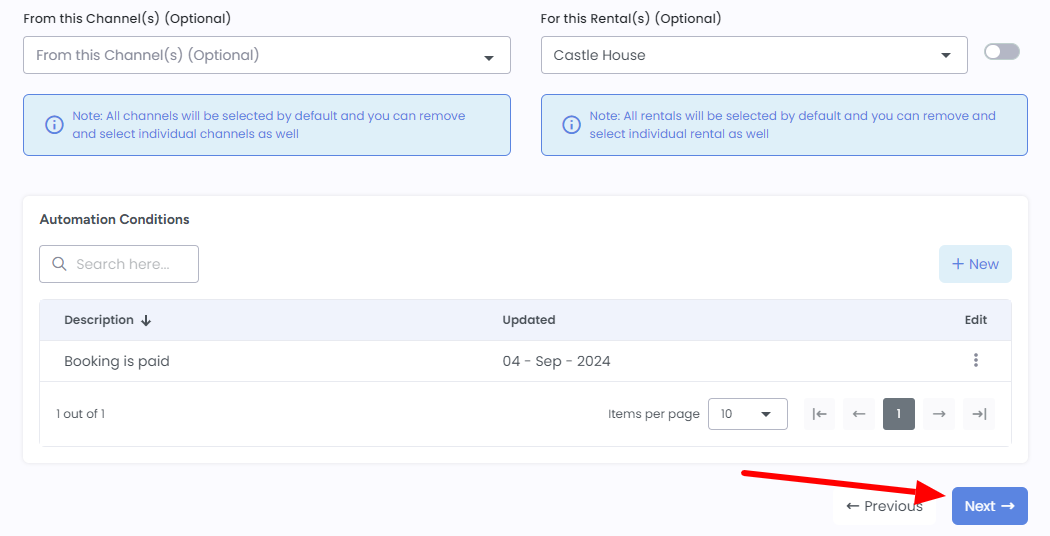
On this step, you can add optional filters for channels and rentals, along with automation conditions.
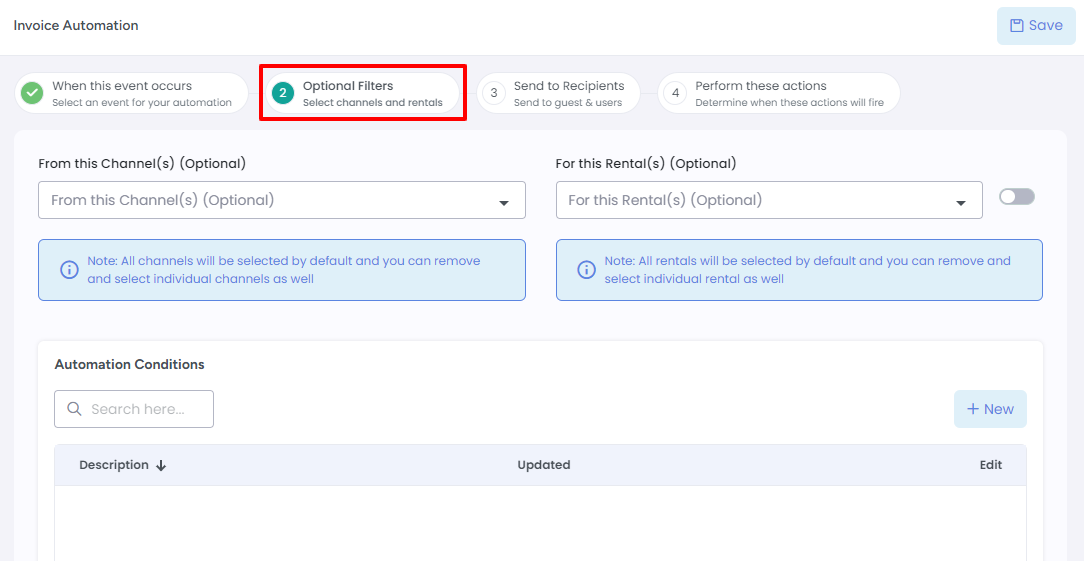
The Channel filter allows you to only apply this automation to channels of your choice, e.g. Airbnb or Booking.com. If left empty, then it will apply to all channels.
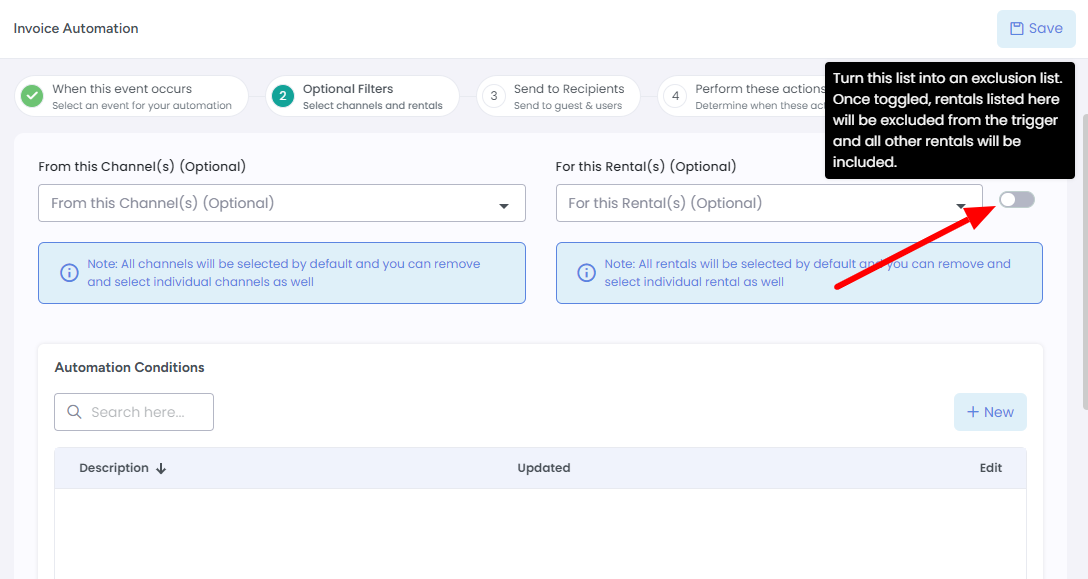
The Rental filter lets you specify the rentals in your account that you want the automation to be applied for. If left empty, then it will apply to all rentals.
There is also an Exclusion toggle for the Rentals list that can be used to select rentals to exclude from the automation instead.
Specify additional conditions
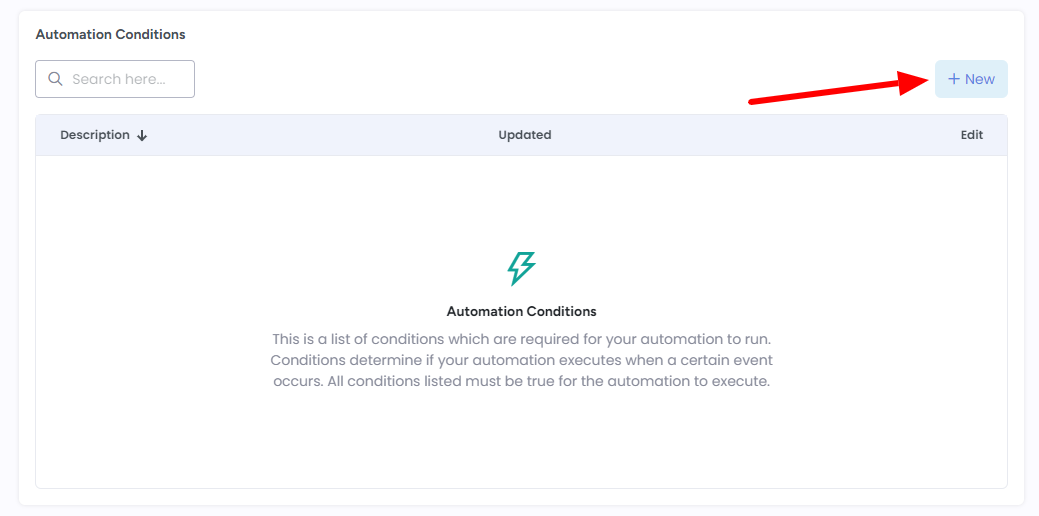
Just like Automata, you can further restrict when an automation is fired under Automation Conditions.
Start by clicking +New to create a new condition.
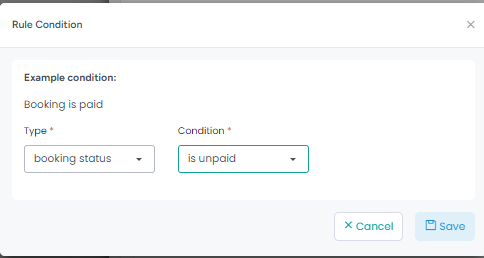
In the example below, we have set a condition to only charge the invoice if the booking status is unpaid. This means that this automation will not fire for bookings that have already been paid (e.g on Airbnb).
Once you've made any changes on this step, click on the Next button.
You will then be taken to the "Send to Recipients" step. Here, you will need to select a recipient from your to receive the invoice email. Guests will be also receive the invoice, by default.

Click Next to proceed to the final step to choose the actions to perform for the invoice.
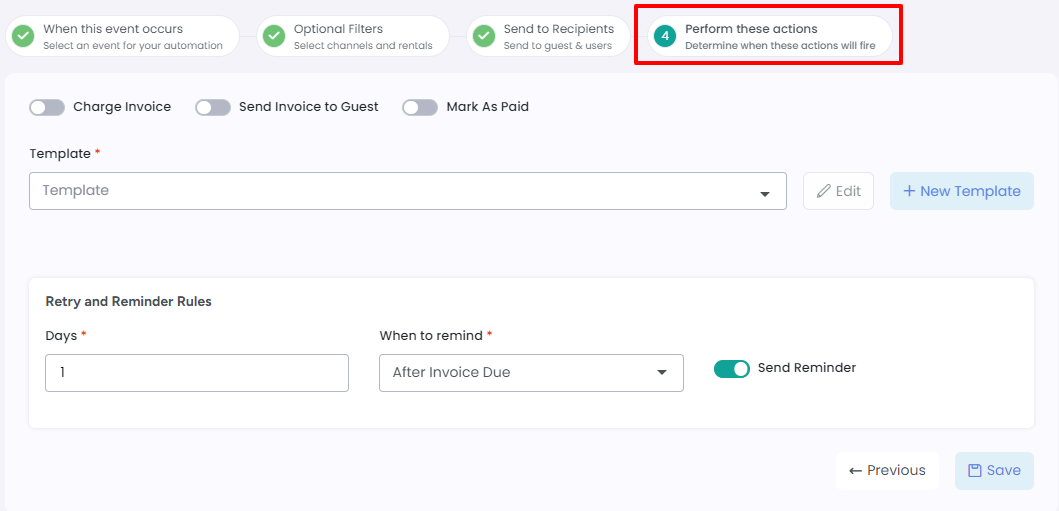
Specify the action(s) to be taken when the trigger fires:
Now that you've set when the trigger should fire it's time to decide what you would like to do when those conditions are met.
In the example below, we have decided to charge the card when the conditions are met. Please note that you can choose any combination of the options seen below. If no options are selected an invoice will be created but no additional actions are taken.

You will need to specify the invoice template to be used for this automation or you can click on the +New Template button to create one.
Specify Retry and Reminder Rules
You can also choose to remind your guests when an invoice is past due by scrolling down to that section.
In the example below, we have set an invoice reminder to occur 1 day after the invoice due date.

Click on the Save button to finalize your invoice automation.
After saving, your invoice automation will appear in a list and will be enabled by default. If you wish to disable an automation, you can use the blue status toggle.
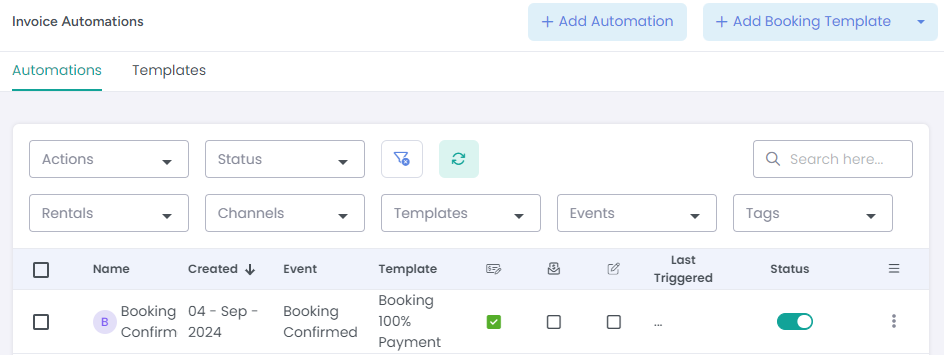
And that's all there is to set up your invoice automations!